Student email (mailbox) migration
Migration tasks
What's happening to your email
Student email accounts are being migrated between 16 - 24 June 2024 to enable expanded access to the Microsoft 365 suite.
Student mailboxes will be moved to the same email environment as staff in batches during the migration. The migration will copy students’:
- Mail (emails and mail folders)
- Calendar
- Contacts
- Tasks
The following will not be migrated:
- Outlook signatures
- Outlook rules
- Microsoft Forms files & data
- Email forwarding set up (managed in Outlook settings)
When is this happening
We will communicate with students throughout the migration – students will receive emails notifying them:
- of the date their mailbox is planned for migration
- the day before their mailbox migration will begin
- that their mailbox has successfully migrated and is ready to use.
Students will need to action a number of tasks before and after the mailbox migration.
NB: If you need to urgently access your email after your mailbox has been migrated, you can access your email via the my.UQ Dashboard.
You will not be able to use your email while we migrate your mailbox. We expect this will take up to three hours.
What you need to do
To ensure your email smoothly moves across to the new system, you need to check some things before and after:
What you need to do before
1. Check if your personal email address in my.UQ is correct.
Our intention is to alert you once your email is migrated using your personal email address.
You can check your personal email and update it, if necessary, in the My profile section of my.UQ.
Log in to my.UQ.
Go to the My profile section.
- Under Personal contact details, review your personal email.
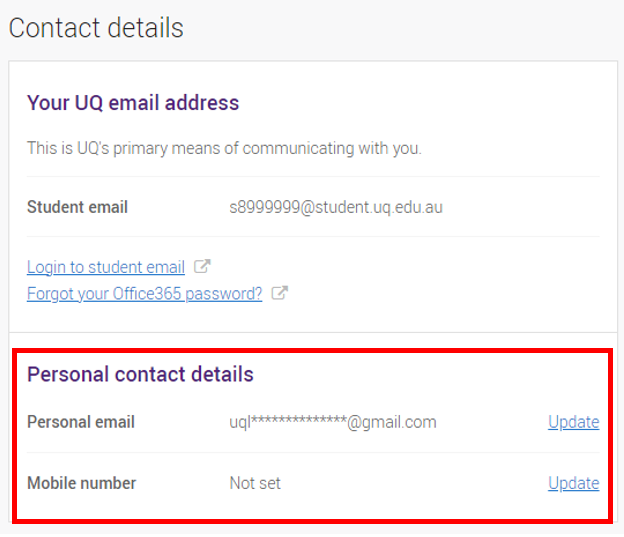
- Update your email if necessary.
2. Check if your legal name and/or preferred name is correct in mySI-net.
You may skip this step if:
- Your legal name has not changed since you enrolled at UQ
- Your legal name is your preferred name
Outlook will use student information in mySI-net to populate display name fields in Microsoft 365.
Example: Personal details in mySI-net
Legal Name | John Smith |
Preferred name | Jack Rogers |
| Outlook Display Name | Jack Rogers |
Preferred name exists in mySI-net
If you have a preferred name set in mySI-net, your Outlook Display Name will be in the following format: <preferred first name> + <preferred last name>, so Jack Rogers in the example above.
No preferred name exists in mySI-net
If you do not have a preferred name set in mySI-net, your Outlook Display Name will be in the following format: <legal first name> + <legal last name> John Smith
If your legal name has changed since you began at UQ, or your preferred name is different to your legal name, it is important that mySI-net reflects this so that your correct first and last name will be used in Microsoft 365 applications like Outlook.
To check your names in mySI-net:
- Log in to mySI-net.
- Go to the Personal Details section.
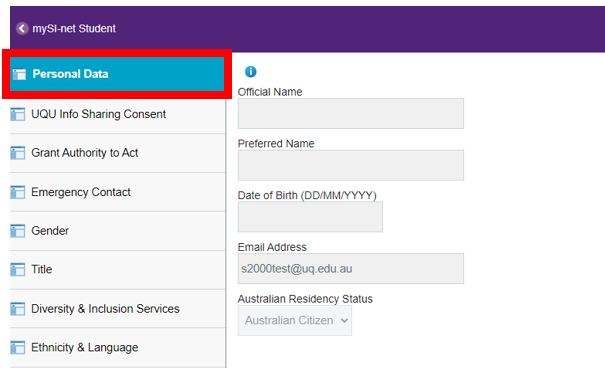
- Review your legal name and preferred name
- If your legal name (in the Official Name field) needs to be updated, you can request an update in my.UQ. You will need to provide an ID document to verify your name change.
- If your preferred name needs to be updated, you can make this change using the Name Details page in mySI-net. You don't need to provide any supporting documents.
3. Export your Outlook rules that you would like to continue using after your mailbox is migrated.
Outlook rules and email signatures will not be migrated, meaning you will need to manually back up rules or signatures you wish to continue using before your account is migrated.
You may skip this step if you do not use Outlook rules.
Watch: How to export your Outlook rules in Outlook for Windows
To export your rules using the Windows Outlook desktop client:
- Click the File tab.
- Click Manage Rules & Alerts.
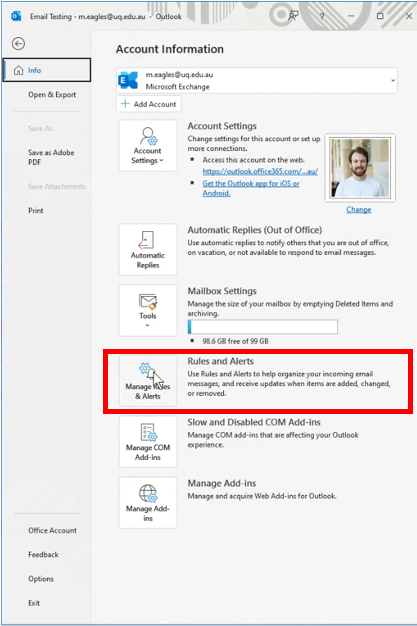
- Click Options. Note: If you have more than one email account, make sure you select your UQ email account in the Apply changes to this folder field.

- Click Export Rules.
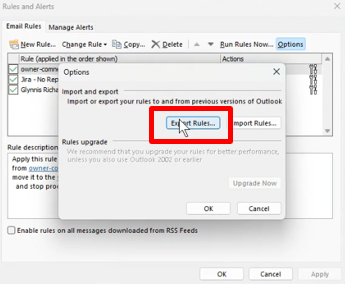
- Select the folder where you want to save the rules file, then in the 'File name' box, type a name for the set of rules that you want to export.
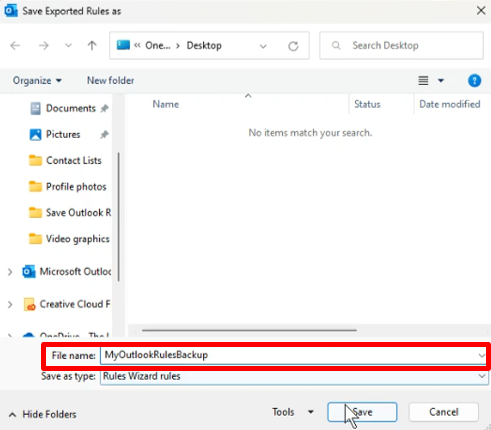
- Click Save.
You can restore your Outlook rules after the mailbox migration.
4. Backup your email signature that you wish to continue using after your mailbox is migrated.
To back up your email signature using the Windows Outlook desktop application:
- Either close Outlook or check that it is closed.
- In the Start menu search box, type %APPDATA%\Microsoft and press Enter.
The folder will open in the File Explorer.
- Find and copy the Signatures folder.
- Paste the copied folder where you would like to create your backup e.g., your desktop.
You can restore your signature after the mailbox migration.
5. Export and save data from Microsoft Forms.
If you used forms, you need to export and save this data before your mailbox is migrated. For guidance, refer to How do I export my form responses?
What you need to do after
We will contact you once your mailbox has been migrated and is ready to access.
If you receive a "mailbox not available" messge after receiving the message that the migration has finished, check again in 30 minutes.
If you require assistance with any of the steps below, contact AskUs.
1. To access your email using Outlook.com
If you use the online version of Outlook, to log in:
- Open your web browser and clear the browser cache.
- Go to https://outlook.office.com/
- For the Sign In, enter your UQ account username in the format username@uq.edu.au, e.g. s1234567@uq.edu.au.
- You will be redirected to the UQ Authenticate page where you need to log in with your student UQ credentials. See the example below.
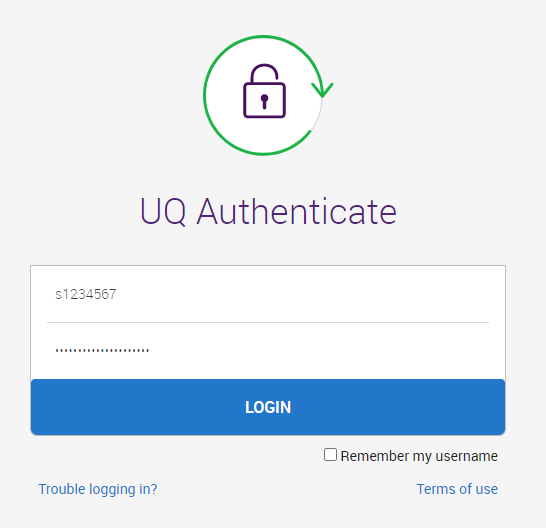
Your Outlook email will display.
2. To access your email using Outlook desktop and mobile apps
If you use a desktop or mobile app to access your emails, your previous email account will no longer work following the migration. To set up your email after the migration, complete the relevant steps.
You will need to:
- Remove your existing Outlook user profile or UQ account if there are multiple email accounts in your Outlook user profile.
- Depending on your action in the previous step, create a new Outlook user profile or new UQ account using the new @student.uq.ed.au email address e.g jo.bloggs@student.uq.edu.au
iPhones and iPads (iOS)
Remove existing profile from Outlook (iOS)
2. Select the face or 3 horizontal line icon in top left next to Inbox depending on your iOS version
3. Tap the "Settings" gear icon located at the bottom left corner of the app
4. Tap on Accounts and select what you want to remove.
5. Scroll down until you see the "Remove Account" option. Tap on it.
6. Confirm that you want to delete the account.
Adding new student account to Outlook (iOS)
2. Click on Add Account
3. If the old account details or another email address populates, click on Skip
4. Enter your student email address as s1234567@uq.edu.au
5. Sign into UQ Authenticate as usual
6. Authenticate with MFA
7. Select Maybe Later
Android devices
Remove existing profile from Outlook (Android)
2. Click on account initials or image icon in top left corner next to Inbox
3. Select Settings Cog
4. Go to Accounts
5. Select account to remove
6. Scroll down and select Remove Account and Select Remove again.
Adding new student account to Outlook (Android)
2. Select Settings Cog
3. Select Accounts > Add account
4. Select Add an email account
5. Enter email address as s1234567@uq.edu.au and click continue
6. Enter credentials in UQ Auth
Your student account is now set up
Macbooks (OSX)
Remove existing profile from Outlook (Mac)
2. Select Tools and click on Accounts
3. Highlight the student account and click the – sign at the bottom of the pane
4. Click Sign Out in the popup
5. Close Outlook
For more information, visit Sign out of an email account in Outlook for Mac
Adding new student account to Outlook (Mac)
2. Select Tools > Accounts
3. Select Add email account
4. Enter your student email account as s1234567@uq.edu.au
5. Enter your login details at the UQ Auth prompt
Windows devices
Remove new student account to Outlook (Windows)
If you have two or more accounts:
- Check your drafts to see if there are any emails you need to keep. If there are, save the content outside of Outlook.
- Select File in the upper left corner of the screen.
- Select Account Settings > Account Settings.
- Select the account you want to delete
- Select Remove.
- Check your drafts to see if there are any emails you need to keep. If there are, save the content outside of Outlook.
- Click File > Account Settings > Manage Profiles
- Select Show Profiles.
- Select a profile
- Select remove and ok
Adding existing profile to Outlook (Windows)
- Open Outlook and select File > Add Account. If you haven't launched Outlook before, you'll see a welcome screen.
- Enter your email address as s1234567@uq.edu.au and select Connect.
- If your screen looks different, enter your name, email address, and password, and select Next.
- Enter your student details in the UQ Auth window
- Select Finish.
Clear the Auto-complete list
This is a list of previously used email addresses you frequently send emails to. Outlook suggests email addresses when typing in the To, Cc and Bcc lines. It may contain email addresses from the old Microsoft environment that contained your mailbox.
Note: the auto-complete list is not your contact list.
To clear your AutoComplete list on Outlook:
- Open Outlook
- On the File tab, select Options.
- Select the Mail tab.
- Under Send Messages, select Empty Auto-Complete List.
- Select Yes.
3. Changing Microsoft account and licenses to new student email
Windows devices
- Open Word
- Click on File > Account
- Select Sign out
- Close Word
Activating your new license details
- Open Word.
- Click File > Account > Sign In.
- Sign in with your UQ credentials, as s1234567@uq.edu.au.
- Reconnect any online drives.
Macbook and Air
Sign out of M365 Applications (Mac)
- In any Office app, select the name of the Office app in the top menu.
- Select Sign Out.
- Quit out of all Office apps.
Activating your new license details
- Open Word
- Click on Sign In
- Sign in with your UQ credentials, as s1234567@uq.edu.au
- You may need to activate the license twice for Macs.
Dissociate Work/School Accounts from Windows
- Click on the Windows icon and type Work
- Choose Access work or school
- Drop arrow down next to each listed account and select Disconnect.
Backup Passwords and Favourites in Ms Edge
Back up your Microsoft Edge passwords
- Within your Microsoft Edge browser, open Settings.
- Navigate to Profiles > Passwords.
- Select the ellipses (…) next to Passwords.
- Select Export passwords.
- You’ll be prompted to choose a location to save your list of passwords. Once you’ve made your selection, select Save.
Back up your Microsoft Edge favourites
- On your Microsoft Edge browser, open the Settings and more menu by selecting … in the upper-right corner of the window.
- Navigate to Favorites.
- Open the More options menu by selecting … above the list of favorited websites.
- Select Export favourites.
- Indicate a saving location, give the file a name you’ll remember, and choose Save.
For more information, visit Microsoft Edge - Backup
Remove a UQ Connect online account from Windows and sign in using a local account
Note: Ensure you backup (preferably to external usb), all of your content prior to these steps
Windows 10 – switch to a local account
- Select Start, select Settings > Accounts > Your info.
- Select Sign in with a local account instead.
- Type the username, password, and password hint for your new account. The username must be different than any others on the device.
- Note: If you’re using Windows 10, version 1803, you can add security questions—instead of a hint—to your local account to help you reset your password in case you forget it. Check your version of Windows 10
- Select Next, then select Sign out and finish. Sign back in with your new local account.
If you didn’t add security questions to help you reset your password, it’s a good idea to create a password reset disk. If you don't do this and then forget your password, you won't be able to recover it.
For more information, visit Microsoft Support
Windows 11 - Create a local user account
- Select Start > Settings > Accounts and then select Family & other users. (In some versions of Windows you'll see Other users.)
- Next to Add other user, select Add account.
- Select I don't have this person's sign-in information, and on the next page, select Add a user without a Microsoft account.
- Enter a username, password, or password hint—or choose security questions—and then select Next.
- Sign back in with your new local account.
For more information, visit Microsoft Support
4. Recreate your Outlook automatic reply
If you use an automatic reply, you need to recreate it as follows.
- In Outlook, select File.
- On the Info page, select Automatic Replies to open the Automatic Replies window.
- Select Send automatic replies.
- On the Inside My Organisation tab, type the response that you want to send to people in the University of Queensland.
5. Import your Outlook rules
If you did not previously export your Outlook rules before the migration, you may skip this section.
Once your account has migrated, you can restore your Outlook rules by importing them.
- In the Windows desktop Outlook application, click the File tab.
- Click Manage Rules & Alerts.
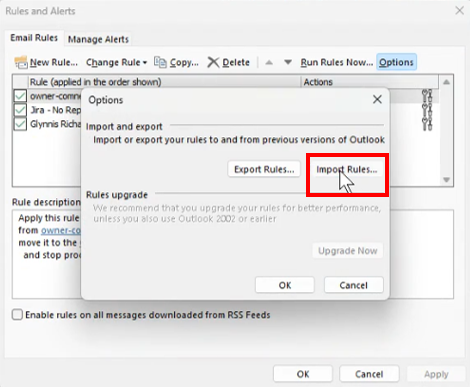
- Click Options.
- Click Import Rules.
- Select the rules file you created previously.
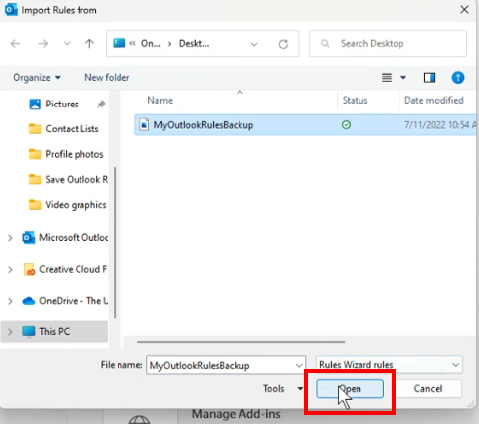
- Click Open to finish importing the rules.
6. Import your email signature
If you did not export y our Outlook email signature before the migration, you may skip this step.
To restore your signature to the Windows Outlook desktop application once your email account has migrated:
- Either close Outlook or check that it is closed.
- Copy the 'Signatures' folder created previously.
- Paste the folder to %APPDATA%\Microsoft.
- Open Outlook - your email signature should be restored.