AMX touch panel audiovisual system user guide
The AMX touch panel audiovisual (AV) system may be installed in departmental meeting rooms, lecture theatres and learning spaces.
You can use the AMX touch panel audiovisual system to control the display screens, speakers, lights and blinds.
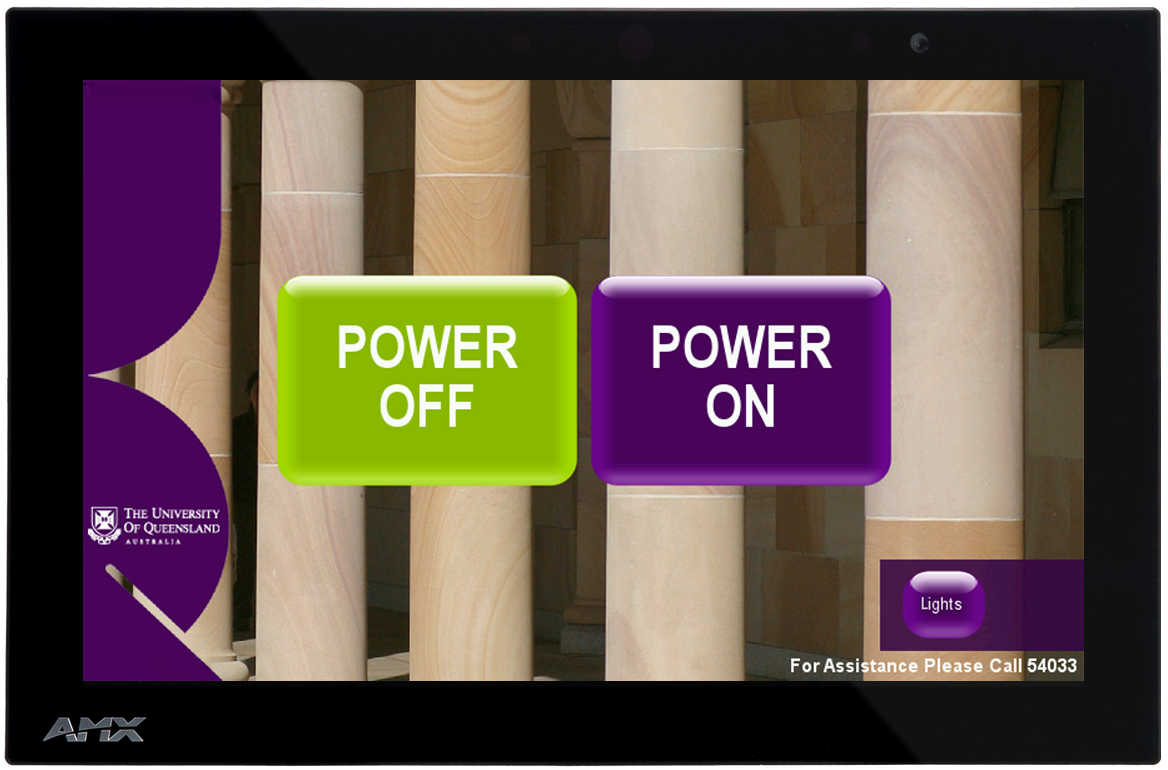
If the AMX touch panel AV system is installed in a room, there will be an AMX touch panel on the meeting table or lectern. The touch panel will look like the one shown here.

Turning the system on and off
To turn the AV system on, push 'POWER ON' on the touch panel. It may take up to 40 seconds for the system to warm up.
If the touch panel display is blank or showing 'PRESS SCREEN TO ACTIVATE', you'll need to touch the screen to activate the touch panel before you can turn the system on.
To turn the system off, push 'POWER OFF' on the touch panel. In central lecture theatres you can also push the red 'Exit' button near the entrance to turn off the AV system and all lights in the room.
Using the Desktop PC in the room
Most lecture theatres have a Desktop PC for making presentations. Make sure the PC is turned on.
You can log in to this computer using your usual UQ username and password, or with:
- username: lecture
- password: lecture
Connecting your own device
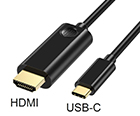
Most rooms with AV display screens have HDMI or USB-C cables you can use to connect your own device to the display screen.
To connect your device:
- Securely connect the HDMI or USB-C cable to your device.

- Make sure you have the correct display settings selected on your device to duplicate (mirror) or extend your device's display onto the room screen.
- Select 'Laptop HDMI' or 'Laptop USB-C' as the source input on the touch panel as relevant.
Display adapters
If your device doesn't have an available HDMI or USB-C port, you'll need to use an appropriate display adapter. Display adapters are not provided by ITS, so you may need to supply your own.
UQ staff can buy adapters through UQeMarket.
If you aren't sure which adapter you need, submit an IT request with the model details of your device.
Checking your device's display settings
To show your device's display on the the screen in the room, you need to select the correct display settings.
On Windows PC devices, press the Windows key + P and then set the display mode to either 'Duplicate' or 'Extend'.
On Apple MacOS devices, press Command ⌘ + F1 to enable the 'Mirror Displays' option.
Controlling what displays on the screen
When you turn on the AV system, source input options will display on the touch panel. These allow you to choose from computers, cameras and other devices that are connected to the system. The display from the selected device will show on the screen.
Select an option to turn on the room’s projector or display screen and show the selected input. The projector may take up to 40 seconds to warm up.

No image
If you want to change display materials or perform private tasks without needing to disconnect your device, you can blank or mute the room display. Select 'No image' from the input options.
Preview
There is a preview monitor on lecterns. By default, this shows the same display as the main display.
To change what displays on the preview monitor:
- Touch 'Preview' on the touch panel.
- Select 'Manual Preview'.
Document camera
Most central teaching spaces on campus have document cameras. You can use the touch panel to control functions like zoom and focus for these cameras. These controls will appear on the touch panel after you select a 'Doc Cam' as the input.
Multiple display screens
If the room has multiple displays, you may see two sets of input options displayed on the touch panel.
Select one option from each set to turn on the corresponding display and show the selected input.

In some rooms you can choose between 'Single' and 'Dual' display mode. In single display mode, all screens in the room will show the same display. In dual display mode you can show a different display on each screen.
To change the current display mode:
- Select 'SINGLE MODE' or 'DUAL MODE' on the touch panel.
- Tap 'Yes' to confirm.
The system will then restart using the selected display mode.
![]()
Joining displays across rooms
You can join AV systems across some adjacent rooms, allowing you to show the display from one room across both rooms. This is commonly available in rooms that are separated by operable walls or that contain multiple collaborative learning spaces.
You need to designate:
- one room as the master room
- the other room as the slave room.
You'll use the AV system in the master room to control the display in both rooms.
Joining room displays
- Make sure the AV system in the slave room is turned off.
- Turn on the AV system in the master room.
- In the master room, press 'Join Room' at the bottom left of the touch panel. You will only have this option if the AV system in the slave room is turned off.
- Select 'Yes' to confirm that you want to join the rooms. The AV system in the slave room will then automatically turn on in slave mode.
- Select a source input from the touch panel in the master room to have that input displayed across both rooms. The touch panel in the slave room will display 'ROOM JOINED SYSTEM IN SLAVE MODE'.
Separating room displays
- In the master room, touch 'Separate Room' on the touch panel.
- Select 'Yes' to confirm.
Audio and microphone controls
When using the room's Desktop PC or your own device, make sure that:
- the volume is turned up on the selected device
- the device is not muted
- the correct audio playback device is selected within the device's audio settings.
Selecting an audio playback device
Follow the steps below to make sure that you have selected the correct audio playback device.
On Windows PC devices:
- Click on Volume in the taskbar at the bottom right of your screen.
- Click the drop down menu above the volume.
- Select the correct playback device.
On Apple MacOS devices:
- Hold down the Option key and click on Volume in the menu bar at the top right of your screen.
- Select the correct playback device.
Volume controls
Volume controls will appear on the touch panel after you select an input. Slide the volume control up and down to increase or decrease the volume. You can also mute and unmute each volume control using the 'Mute' button under it.
You can access additional volume controls by selecting 'Volume' on the touch panel.
You may also have:
- Program Audio: this control is available when you select an input device with sound capabilities, such as a Desktop PC or laptop
- Lectern Mic: this control is available on all systems with a lectern microphone fitted
- Radio Mic: this control is available on all systems with a radio microphone receiver fitted. Make sure you change the frequency of your lapel microphone transmitter unit to match the frequency shown on the control.
Lighting controls
You can access lighting controls by selecting 'Lights' on the touch panel. The available lighting control options will vary between systems, depending on the design of the teaching space.
Room lighting will change automatically when the AV system is turned on and off, and when you make an input selection. You can disable this by touching 'Lights' and then selecting 'Manual Lighting'.
Most central lecture theatres have illuminated lighting controls near the entrance:
- the green 'Entry' button turns on the room lighting
- the red 'Exit' button turns off all lights and the AV system.
Screen and blind controls
The AV system controls the motorised projection screens and blinds. These will automatically extend when you select a source input and retract when you turn the system off.
You can control the screens and blinds manually by selecting 'Screens' or 'Blinds' on the touch panel.
Need help now?
If you need urgent technical support for this system, contact our on-call audiovisual support service.
Download
Download this guide in PDF format:
