Crestron touch panel audiovisual system user guide
The Crestron touch panel audiovisual (AV) system is installed in all central teaching spaces and some departmental teaching spaces.
The system is used to control the display screens, speakers, lights and blinds in these rooms.
If the Crestron touch panel AV system is installed in a room, there will be a Crestron touch panel on the lectern. The touch panel will look like the one shown here.
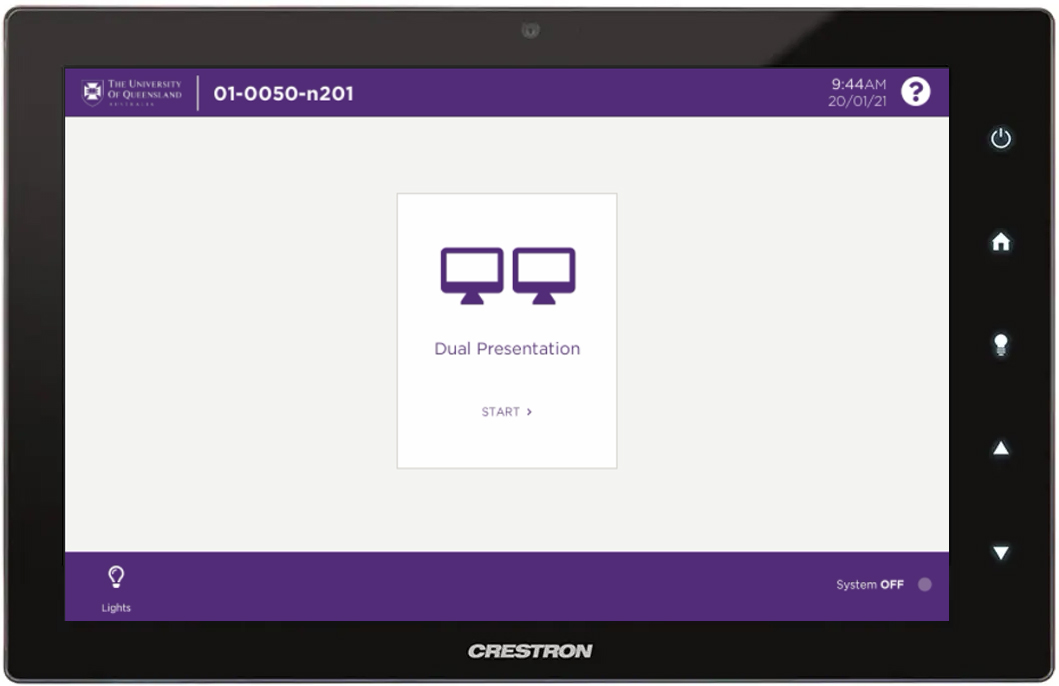
If the touch panel shows an 'AMX' logo, follow the instructions on the AMX touch panel audiovisual system user guide.
Parallel teaching
You can watch a video guide about how to deliver parallel teaching using the Crestron touch panel AV system.
Watch: Parallel teaching using the Crestron touch panel
See Parallel teaching from a UQ lecture theatre for information about how to teach to a physical class in a UQ teaching space and on Zoom at the same time.
Turning the system on and off
To turn the AV system on, select either 'Single Presentation' or 'Dual Presentation' on the touch panel.
If the touch panel display is blank, touch the blank screen to wake the touch panel before turning the system on.
To turn the system off, push 'Exit System' on the touch panel, then select 'YES, SHUTDOWN' to confirm. You can also select the physical power button on the top right of the touch panel.
Using the desktop PC in the room
Most lecture theatres have a Desktop PC for making presentations. Make sure the PC is turned on.
You can log in to this computer using your UQ username and password.
Connecting your own device
You can connect your own device to the AV system in most rooms using the available HDMI or USB-C cables.
To connect your device:
- Securely connect the HDMI or USB-C cable to your device.
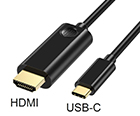
- Make sure you have the correct display settings selected on your device to duplicate (mirror) or extend your device's display onto the room screen.
- Select 'Laptop HDMI' or 'Laptop USB-C' as the source input on the touch panel as relevant.
Display adapters
If your device does not have an available HDMI or USB-C port, you will need to use an appropriate display adapter. Display adapters aren't provided by ITS, so you may need to supply your own.
UQ staff can buy adapters through UQeMarket.
If you aren't sure which adapter you need, submit an IT request with the model details of your device.
Checking your device's display settings
To show your device's display on the the screen in the room, you need to select the correct display settings.
On Windows PC devices, press the Windows key + P and then set the display mode to either 'Duplicate' or 'Extend'.
On Apple MacOS devices, press Command ⌘ + F1 to enable the 'Mirror Displays' option.
Controlling what displays on the screen
When you turn on the AV system, source input options will display along the sides of the touch panel. These allow you to choose from computers, cameras and other devices that are connected to the system. The display from the selected device will show on the screen.
Select an option to turn on the room's projector or display screen and show the selected input. The display may take a few seconds to power on.
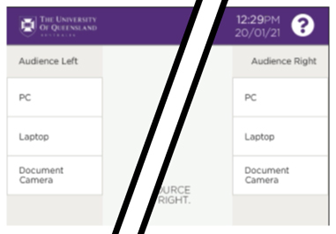
Multiple display screens
If the room has multiple displays, you may see two sets of input options displayed on either side of the touch panel.
Select one option from each set to turn on the corresponding display and show the selected source input.
How to mute the screen
If you want to stop showing a source input on the room's display, touch the currently selected input to unselect it. This will mute the room's display.
Preview
There is a preview monitor on lecterns within central teaching spaces. By default, the preview monitor will follow the last selected source input for the room's main displays.
To change what displays on the preview monitor:
- Touch 'Preview' on the touch panel.
- Select the source input you would like to show on the preview monitor.
If you would like to prevent the preview monitor from switching inputs when a new source input is selected for the room's main displays, disable the 'Auto Preview' option.
Document camera
Most central teaching spaces on campus have document cameras. You can use the touch panel to control the functions like zoom and focus for these cameras. These controls will appear on the touch panel after you select a 'Document Camera' as the input.
Help button
You can press the help icon on the top right of the touch panel to see several pop-ups that provide more information about the options available on the touch panel. It will also show the number to contact the AV Support team.
Joining AV systems across rooms
You can join AV systems across some adjacent rooms, allowing you to control the audio and displays within both rooms from one touch panel. This is commonly available in rooms that are separated by operable walls or that contain multiple collaborative learning spaces.
You need to designate:
- one room as the primary room
- the other room as the secondary room.
You'll use the AV system in the primary room to control the AV system in both rooms.
Joining AV systems
- Make sure the AV system in the secondary room is turned off.
- Turn on the AV system in the primary room.
- In the primary room, press 'Room Link' at the bottom left of the touch panel. You will only have this option if the AV system in the secondary room is turned off.
- Select 'LINK' to confirm that you want to join the rooms. The AV system in the secondary room will then automatically turn on in secondary mode.
- Select a source input from the touch panel in the primary room to have that input displayed across both rooms. The touch panel in the secondary room will display 'THIS TOUCH PANEL IS LOCKED. PLEASE USE THE PRIMARY TOUCH PANEL.'
Separating AV systems
- On the primary room's touch panel, touch 'Room Link'.
- Select 'UNLINK'. The AV system in the secondary room will turn off.
Audio and microphone controls
When using the room's Desktop PC or your own device, make sure that the:
- volume is turned up on the selected device,
- the device is not muted,
- and the correct audio playback device is selected within the device's audio settings.
Selecting an audio playback device
Follow the steps below to make sure that you have selected the correct audio playback device.
On Windows PC devices:
- Click on Volume in the taskbar at the bottom right of your screen.
- Click the drop down menu above the volume.
- Select the correct playback device.
On Apple MacOS devices:
- Hold down the Option key and click on Volume in the menu bar at the top right of your screen.
- Select the correct playback device.
Volume controls
Source input volume control
A volume control slider will appear on the touch panel if you have selected a source input that uses sound, such as the Desktop PC or a laptop.
Slide the volume control left or right to increase or decrease the volume of the device within the room's sound system. You can also mute the device by selecting the speaker icon on the right of the volume slider.
Microphone volume control
- Select 'Microphones' on the touch panel to access the microphones volume page. Each microphone in the room will have its own volume slider.
- Slide the volume control left or right to increase or decrease the volume of the selected microphone within the room's sound system. You can also mute the microphone by selecting the speaker icon on the right of the volume slider.
Lighting controls
In many central teaching spaces on campus you can access lighting controls by selecting 'Lights' on the touch panel. The available lighting control options will vary between rooms, depending on the design of the teaching space.
Room lighting may change automatically when the AV system is turned on and off, or when you make a source input selection. You can disable this by touching 'Lights' and then disabling 'Auto Lights'.
Most central teaching spaces have illuminated lighting controls near the entrance:
- the green 'Entry' button turns on the room lighting before the AV system has been turned on
- the red 'Exit' button turns off all lights if the AV system has been turned off.
Screen and blind controls
The AV system controls motorised projection screens and blinds. They will automatically extend when you select a source input and retract when you turn the system off.
You can control the screens and blinds manually by selecting 'Screens' or 'Blinds' on the touch panel.
Lecture recording
Learning spaces with an Echo360 recorder installed will show a ‘Record’ option on the room’s touch panel. This button will appear red if a recording is in progress.
The 'Audio' and 'Video' status indicators will appear green to confirm that the Echo360 recorder is receiving audio and video. These indicators will only show green when a recording is in progress.
If Echo360 is not recording, you can select ‘Record’ to see details of the next scheduled recording, or start an ‘Ad Hoc’ recording.
If Echo360 is recording, you can select ‘Record’ to access functions to pause, stop, or extend the time of the recording.
See the Lecture recordings page for more information about scheduling and managing lecture recordings.
Starting an ad hoc lecture recording
To start an 'Ad Hoc' lecture recording using the room's Echo360 recorder:
- Turn on the room’s AV system.
- Select the source input(s) you want to record.
- Make sure your selected source input(s) can be heard through the room’s sound system, if required.
- Make sure the required microphones are working correctly and not muted.
- Make sure the AV system is not currently recording. The ‘Record’ option should not be red.
- Select ‘Record’ on the touch panel.
- Select ‘Request Ad Hoc’.
- Touch the empty ‘Course Code’ field, then use the on-screen keyboard to enter your course code. If your recording is not associated with a course, use this field to give your recording a title. Once complete, select ‘Enter’.
- Touch the empty ‘Presenter Email’ field to enter your email address, then select 'Enter’.
- Use the up and down arrows to adjust the recording time required.
- Select ‘START RECORDING’ to being recording.
The AV system may take up to 30 seconds to start the recording process. Once the recording has started, the ‘Record’ option will turn red and the 'Audio' and 'Video' status indicators will turn green.
It may take up to 48 hours for an ad hoc lecture recording to become available in Echo360, or be published to your lecture recordings page in Blackboard. If the recording has not become available after 48 hours, submit an IT request.
Stopping a lecture recording
If you want to stop a lecture recording before it is scheduled to finish:
- Select ‘Record’ on the touch panel.
- Select ‘Stop’.
- Select ‘YES’ to confirm.
Pausing a lecture recording
You might want to pause a lecture recording during breaks, or to control which parts of your presentation are recorded.
- Select ‘Record’ on the touch panel.
- Select ‘Pause’.
- Select ‘Resume’ to continue recording.
Extending a lecture recording
You might want to extend a lecture recording beyond the time it is scheduled to finish.
- Select ‘Record’ on the touch panel.
- Select ‘Extend’.
- Use the up and down arrows to add or remove time to the recording.
- Select ‘Extend’ to confirm the change.
Your recording will automatically end shortly before a new scheduled lecture recording is due to take place, regardless of how long you've chosen to extend your recording.
Sharing video with a video conferencing client
It is possible to share a teaching space’s source inputs and room camera with the room’s PC, to make them available as a camera input within your preferred video conferencing client, such as Zoom or Microsoft Teams.
Sharing a source input with the room PC
To use an available source input as a camera input within your preferred video conferencing client:
- Turn on the AV system.
- Select ‘PC’ from the available source inputs.
- Select ‘Share’ on the touch panel.
- Select the source input you would like to share with the room’s PC.
- Log in to the room’s PC, then log in to your preferred video conference client.
- Within the video conferencing client, locate the client’s settings, then locate the settings to choose a webcam.
- Within Zoom, you will find a drop-down menu under Settings > Video > Camera.
- Within Microsoft Teams, you will find a drop-down menu within Settings > Devices > Camera.
- From the available camera option, select ‘USB Capture Device’, then close the settings.
Your video conferencing client will now use your selected input source as the camera source, instead of the PC's webcam.
Sharing a room camera with the room PC
Within most central teaching spaces, you can use an adjustable room camera as the camera input within your preferred video conferencing client. This allows you to point a camera at any part of the teaching space, which may be ideal for online team meetings or group discussions.
- Turn on the AV system.
- Select ‘PC’ from the available source inputs.
- Log in to the room’s PC, then log in to your preferred video conference client.
- Within the video conferencing client, locate the client’s settings, then locate the settings to choose a webcam.
- Within Zoom, you will find a drop-down menu under Settings > Video > Camera.
- Within Microsoft Teams, you will find a drop-down menu within Settings > Devices > Camera.
- From the available camera option, select ‘Room Camera’, then close the settings.
The room camera will now be the camera input within your video conferencing client.
To adjust the position of the room camera, select 'Room Camera' on the touch panel, then use the available options to control pan, tilt and zoom.
Using PowerPoint with presenter view
It is not possible to use Microsoft PowerPoint's 'Presenter View' when presenting from the desktop PC within a UQ teaching space. However, you can use 'Presenter View' when you connect your own laptop.
- Turn on the room's AV system.
- Select the 'Laptop' input.
- Connect your laptop to the room's AV system via the available HDMI or USB-C cable.
- On Windows PC devices, press the Windows key + P and then set the display mode to 'Extend'.
- On Apple MacOS devices, press Command + F1 to make sure 'Mirror Displays' is disabled.
- Start Microsoft PowerPoint on your laptop and then open your presentation.
- Under the 'Slide Show' tab, tick 'Use Presenter View'.
- Select 'From Beginning' to start your presentation in Presenter View.
You should now see the 'Presenter View' interface on your laptop screen and the full screen presentation on the room's displays. If these 2 displays are the wrong way around, you can swap them:
- Select 'DISPLAY SETTINGS' at the top of the Presenter View interface.
- Select 'Swap Presenter View and Slide Show'.
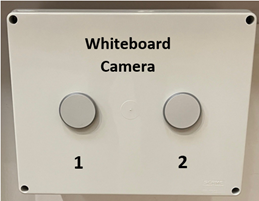
Whiteboard cameras
Whiteboard camera functionality has been added to some existing audiovisual teaching spaces to display written content on video projectors, Echo recordings, and Zoom.
Using physical buttons (recommended)
- Turn on the audiovisual system by selecting 'Single Presentation' or 'Dual Presentation' on the touch panel.
- Press the whiteboard button located under the fixed whiteboard or beside the sliding whiteboard. The button illuminates red when active.
- In 'Dual Presentation' spaces, the whiteboard displays on 'Audience Right' only.
- Press another whiteboard button to move the camera to the next zone.
- Press an illuminated button again to return to the previous source, e.g. 'Document Camera'.
Using the touch panel
- Turn on the audiovisual system by selecting 'Single Presentation' or 'Dual Presentation'.
- Select 'Whiteboard Camera' from the AV Source menu.
- Select the camera preset for the desired whiteboard zone.
- In 'Dual Presentation' spaces, 'Audience Right' should be selected to allow use of the physical buttons.
- Change camera presets using either:
- the physical whiteboard buttons, or
- the presets on the AV Source page.
- For fine control of the camera position, use the pan, tilt and zoom controls.
Need help now?
If you need urgent technical support for this system, contact our on-call audiovisual support service.